



01 First time using Swapface
If this is your first time using Swapface, start here to learn what Stream does and how the full workflow fits together.
Swapface Stream applies realtime face swap to your camera feed and sends the processed video to video call or streaming apps. Swapface does not connect directly to Zoom, Google Meet, and similar platforms—you pass the feed through a virtual camera.
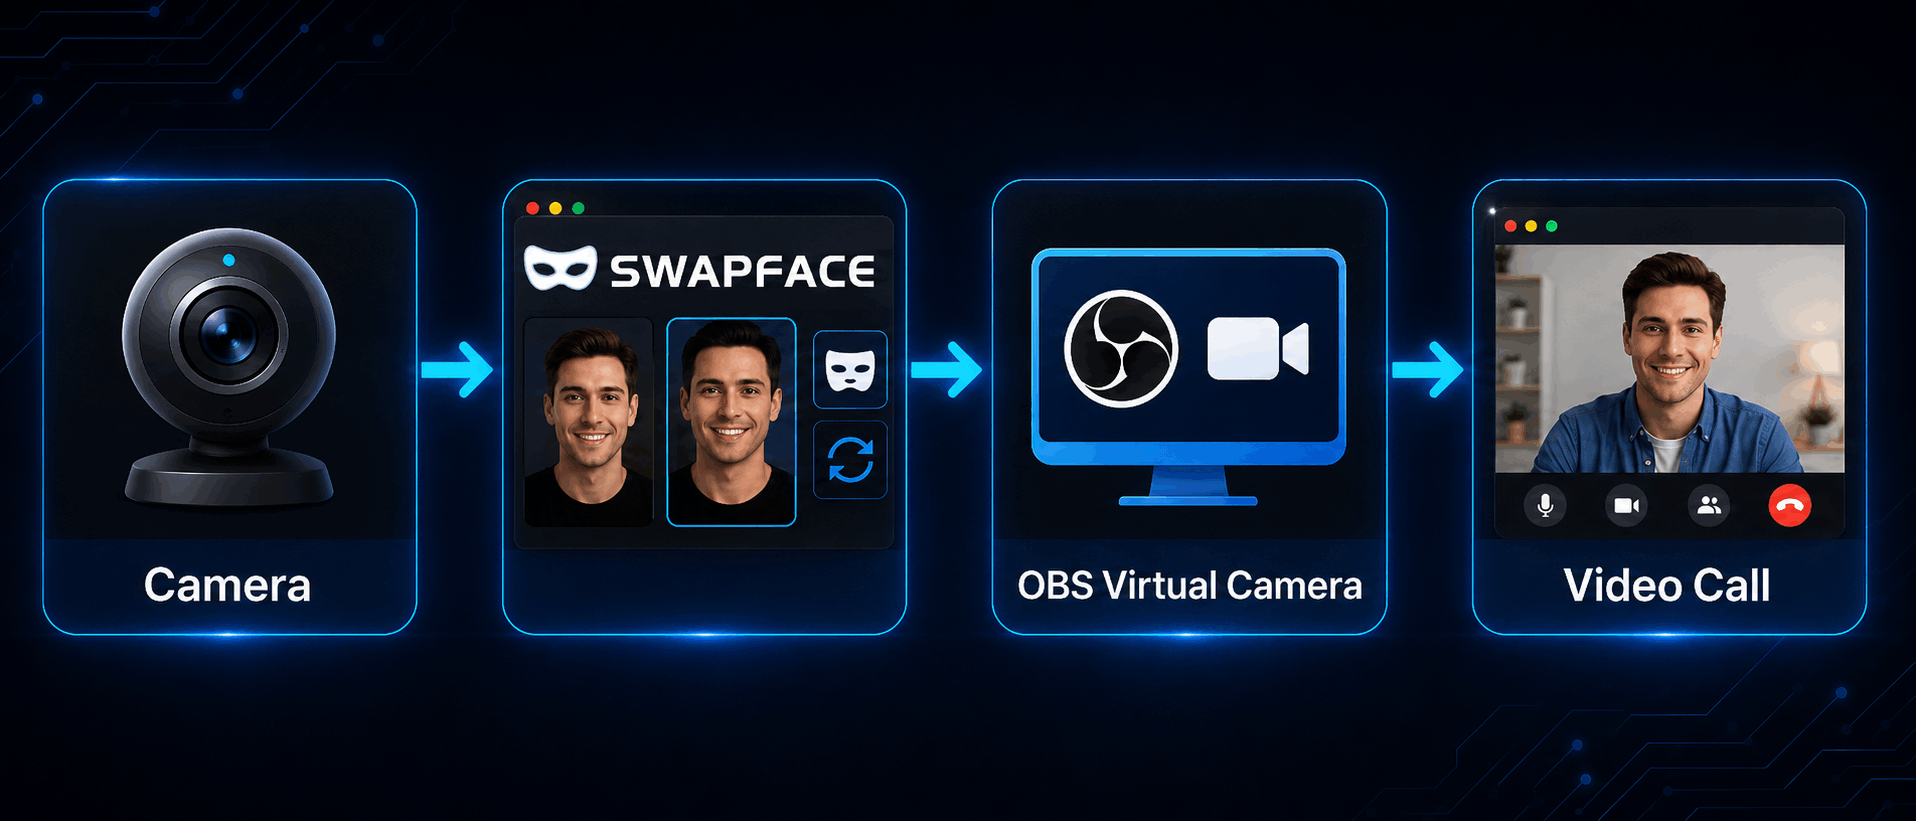
In this workflow:
- Camera: provides the live person feed. You can use the built-in Mac camera, a USB camera, or an iPhone camera.
- Swapface Stream: detects faces in realtime and applies face swap.
- OBS Virtual Camera: outputs the Swapface-processed feed as a virtual camera.
- Video call / streaming apps: receive the virtual camera feed, for example Google Meet or Zoom.
If this is your first setup, you do not need to install any extra components ahead of time.
The rest of this guide walks you through the full sequence:
Download Swapface → finish Mac install and permissions → install OBS Studio → enable OBS Virtual Camera → configure Stream → join a video call
After you finish every step, you can use the Swapface-processed feed as your camera input in video call or streaming apps that support virtual cameras.
02 Install all required software
Before using Swapface Stream, install both Swapface and OBS Studio.
These two apps handle realtime face swap and virtual camera output. Together they form the base environment for Stream on Mac.
2.1 Download and install Swapface
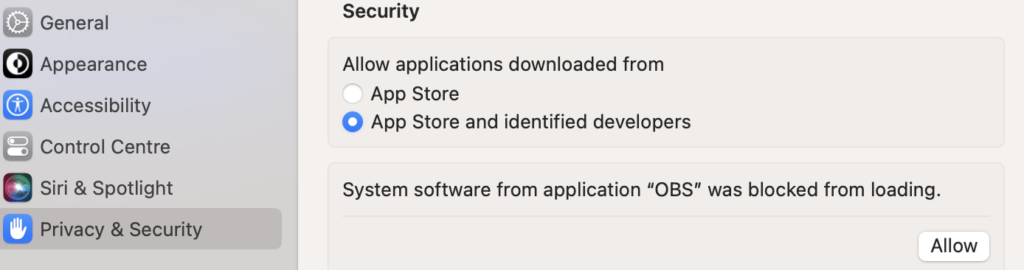
First, visit the Swapface website and download the Mac client. After installation, the first launch may be blocked by macOS security settings.
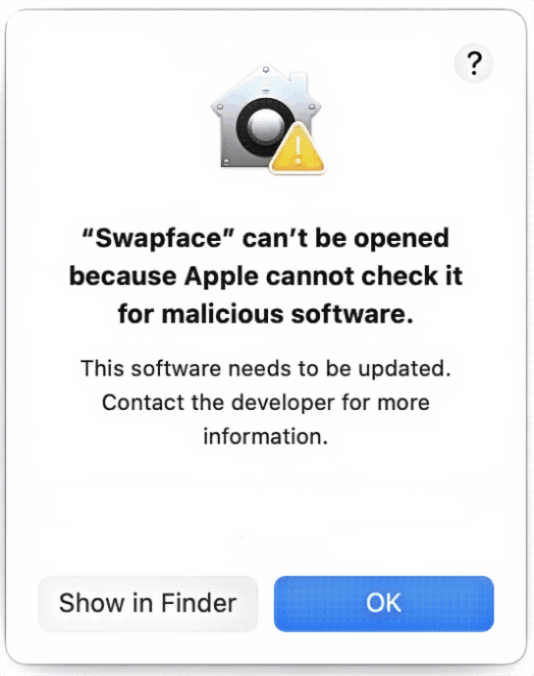
Don’t worry. This happens because the app has not been notarized by Apple. Swapface is safe and has been used by more than 500,000 users. Open Privacy & Security in System Settings, then choose Open Anyway for Swapface.
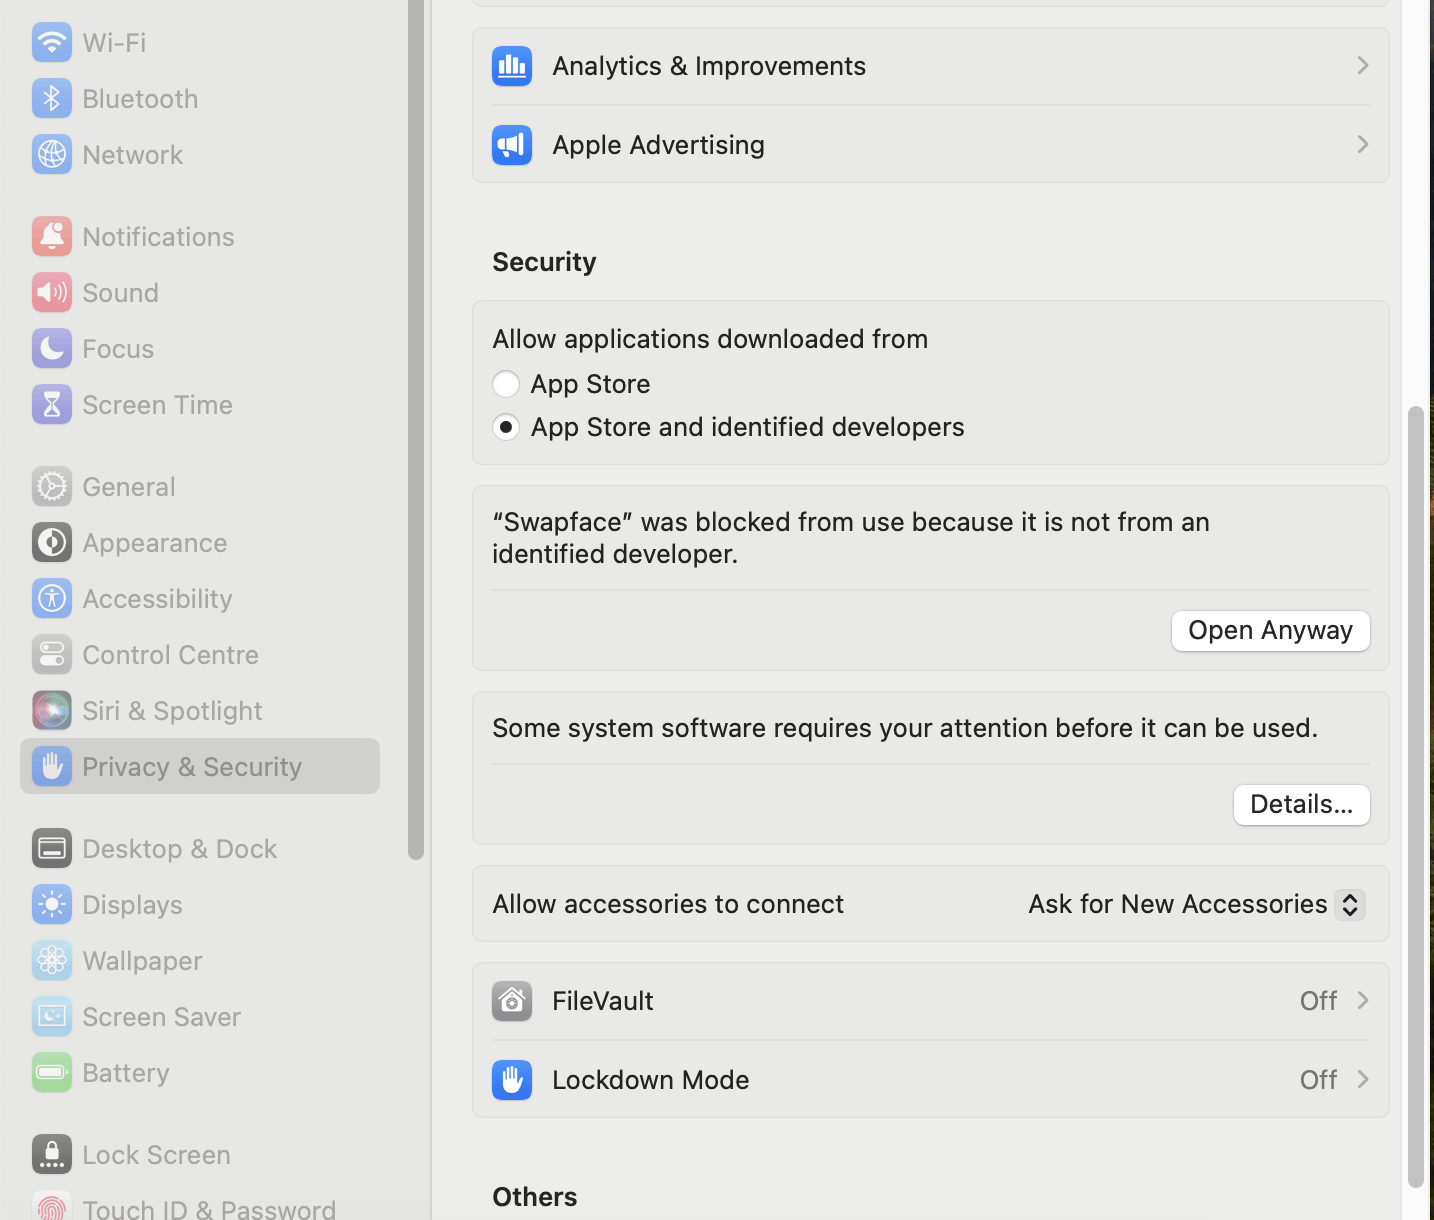
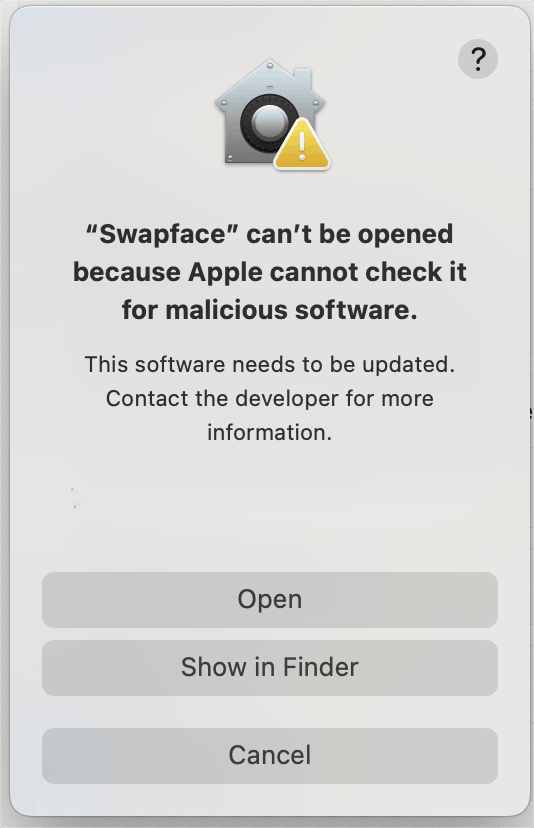
Confirm opening the app again to launch Swapface normally. After it starts, sign in or create your Swapface account, then open the Stream page.
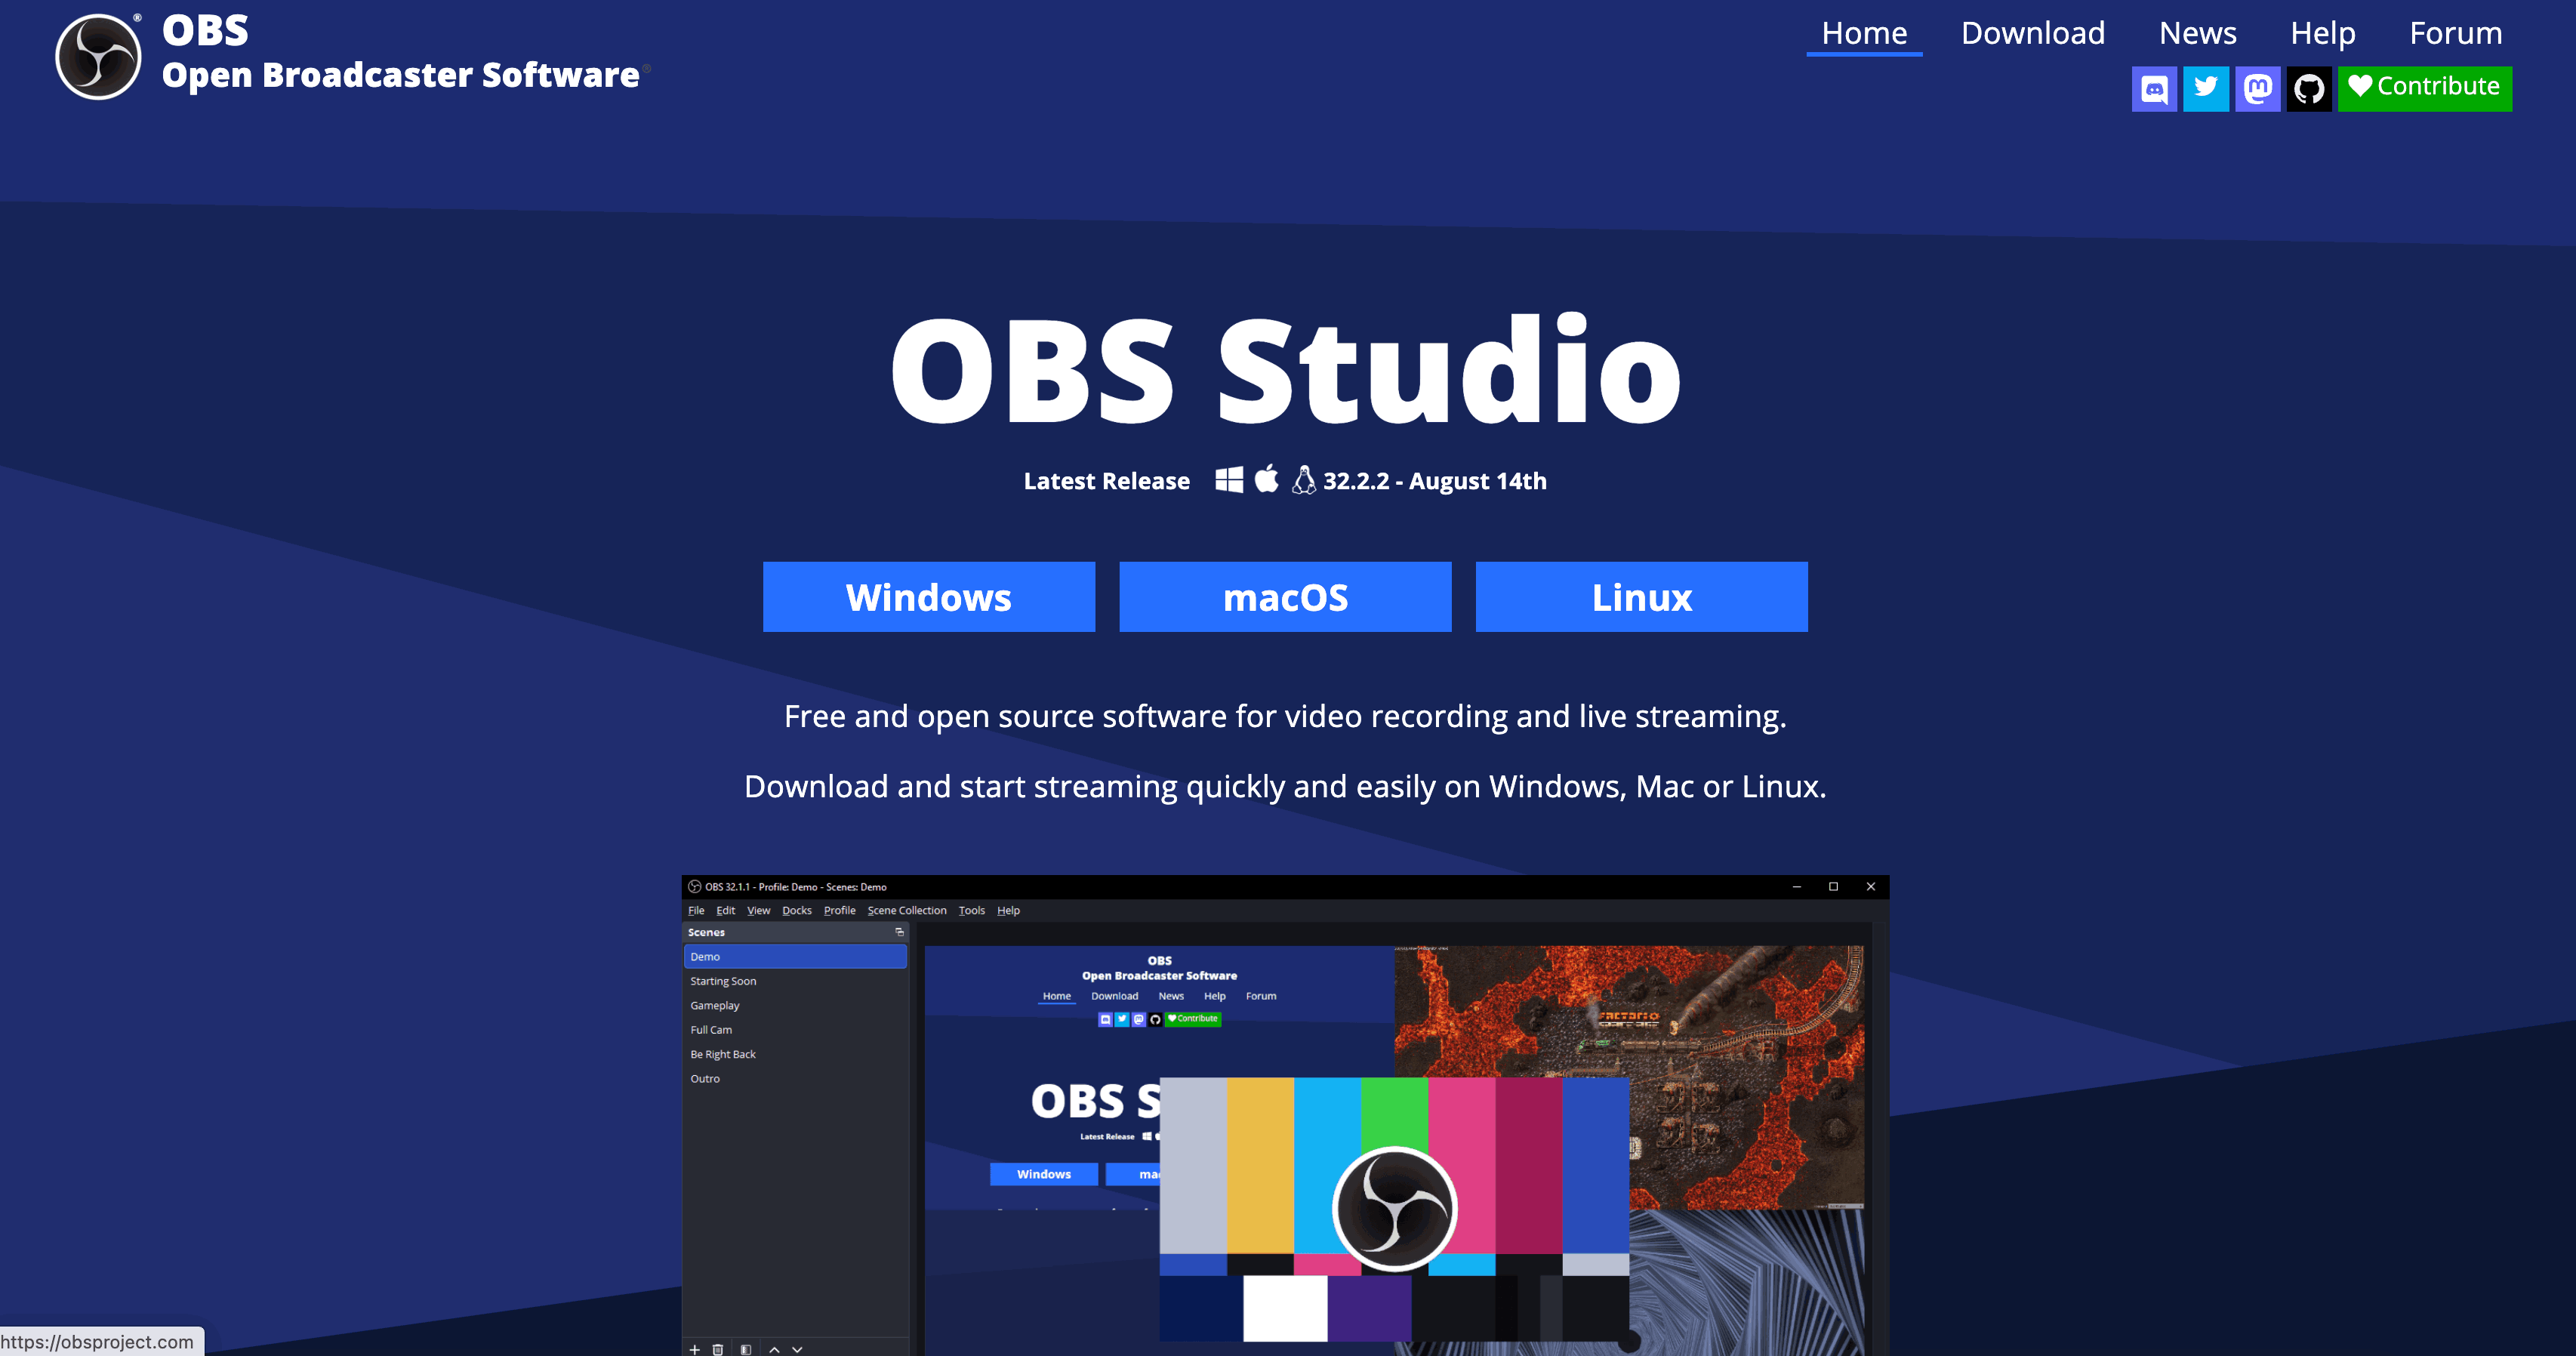
2.2 Download and install OBS Studio
After Swapface finishes realtime face swap, you still need a virtual camera to send the processed feed to Google Meet, Zoom, and similar apps, so install OBS Studio.
Recommended:
OBS Studio 30.0 or later
If an authorization prompt appears while installing OBS, grant OBS install permission under Privacy & Security in System Settings.
After installation, open OBS Studio for the first time and find:
Start Virtual Camera
Click to start the virtual camera. If macOS shows a permission prompt, follow the system instructions. Then you can close OBS Studio and restart Swapface.
When you return to the Swapface Stream page, you should see this in the output devices:
OBS Virtual Camera
That means the virtual camera is installed and ready to use.
2.3 After installation, you should have these
After the steps above, confirm your Mac has:
- Swapface for Mac
- OBS Studio
- OBS Virtual Camera
- A working camera device
You can use:
Built-in Mac camera / USB Camera / iPhone Camera
At this point, the base software environment is ready.
Next, configure Swapface Stream: select a camera, a face, and the virtual camera output.
03 Configure Swapface Stream
After Swapface and OBS Studio are installed, configure Stream.
This section covers three basic settings:
Select a camera → select a face → select an output device
Once these three are set, Swapface can start realtime face swap.
3.1 Open Stream
Open Swapface and go to:
Stream
You will see the live camera preview, the face selection area, and output device settings.
If this is your first time, keep other parameters at their defaults and only finish the basic camera, face, and output setup.
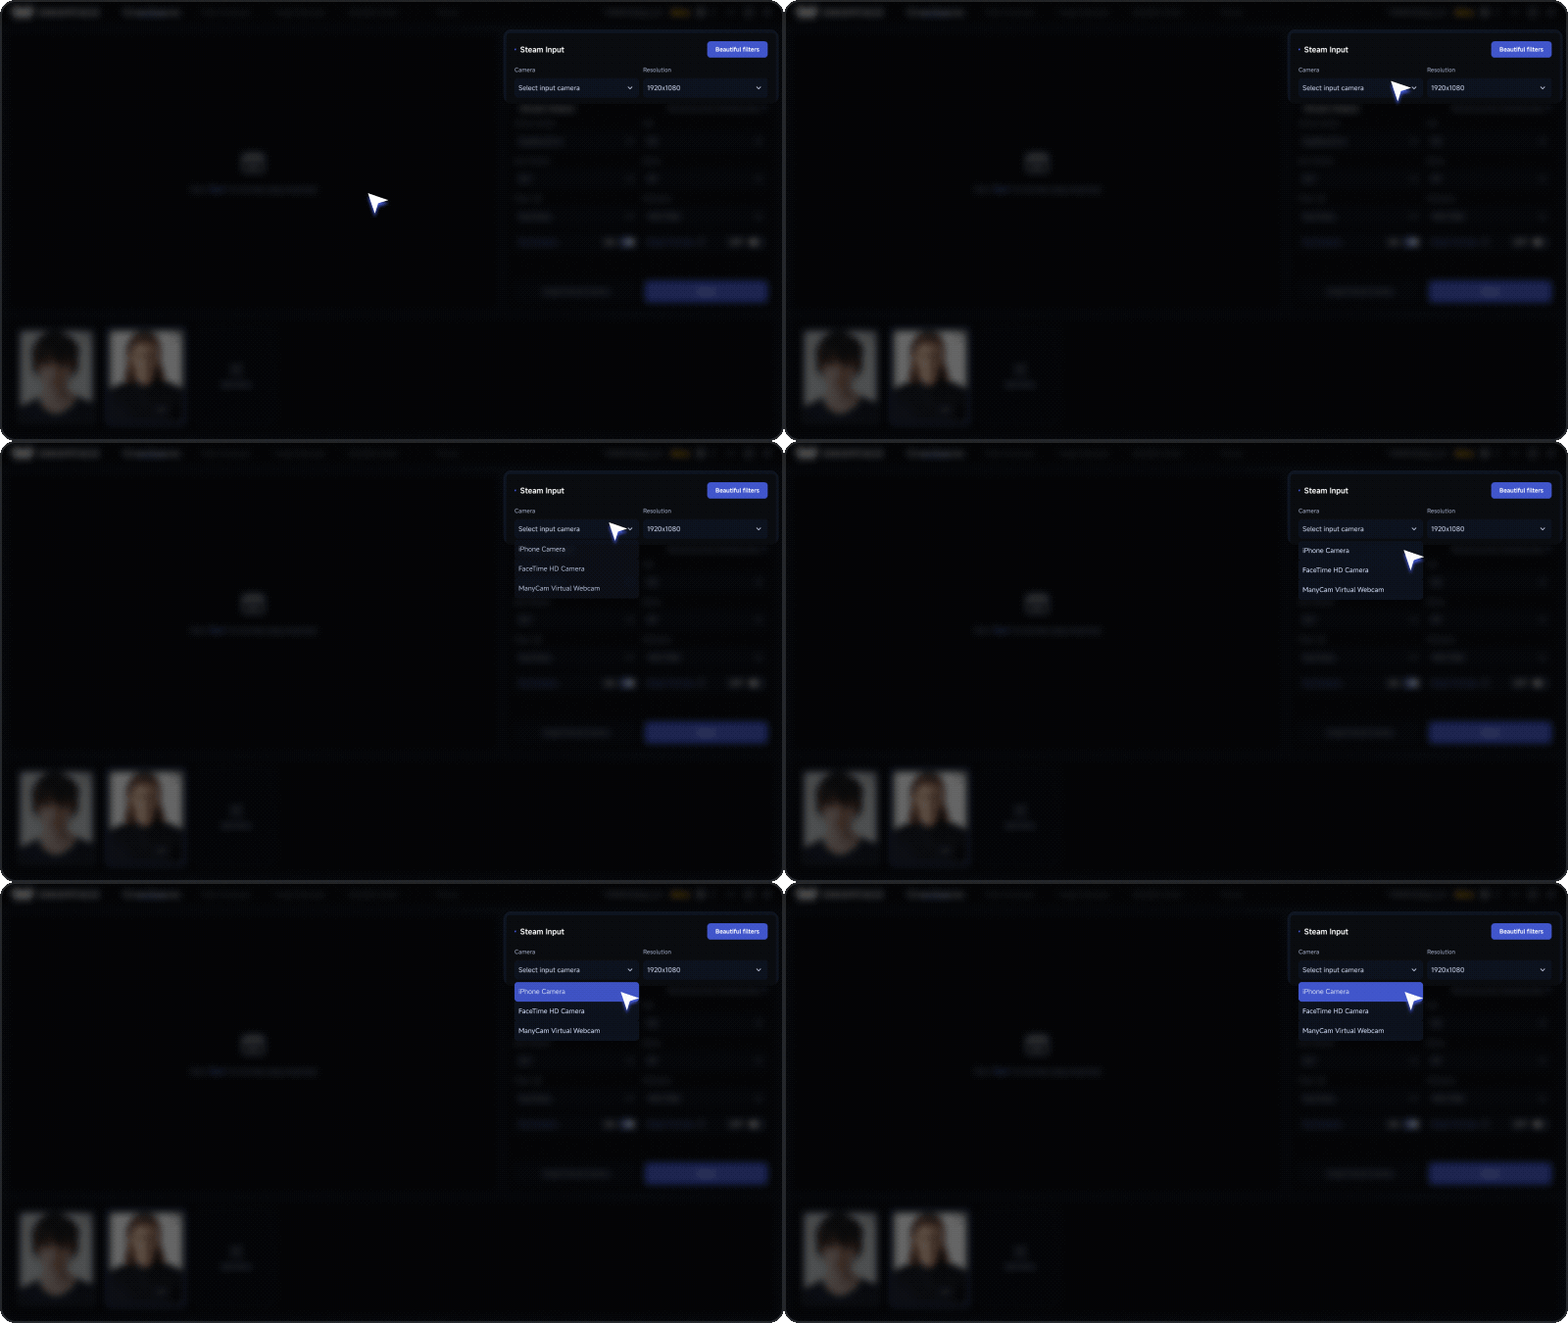
3.2 Select a camera
In the Video Input / Camera area, select the camera you want to use.
On Mac, choose based on your device:
- Built-in Mac camera
- USB Camera
- iPhone Camera
After selecting, confirm the preview shows a live feed.
If the camera does not appear in the device list, check macOS camera permissions, or confirm another app is not using the camera.
If possible, Mac users can also use an iPhone as the camera input. Compared with a typical built-in camera, an iPhone usually provides a clearer image.
3.3 Select the face to use
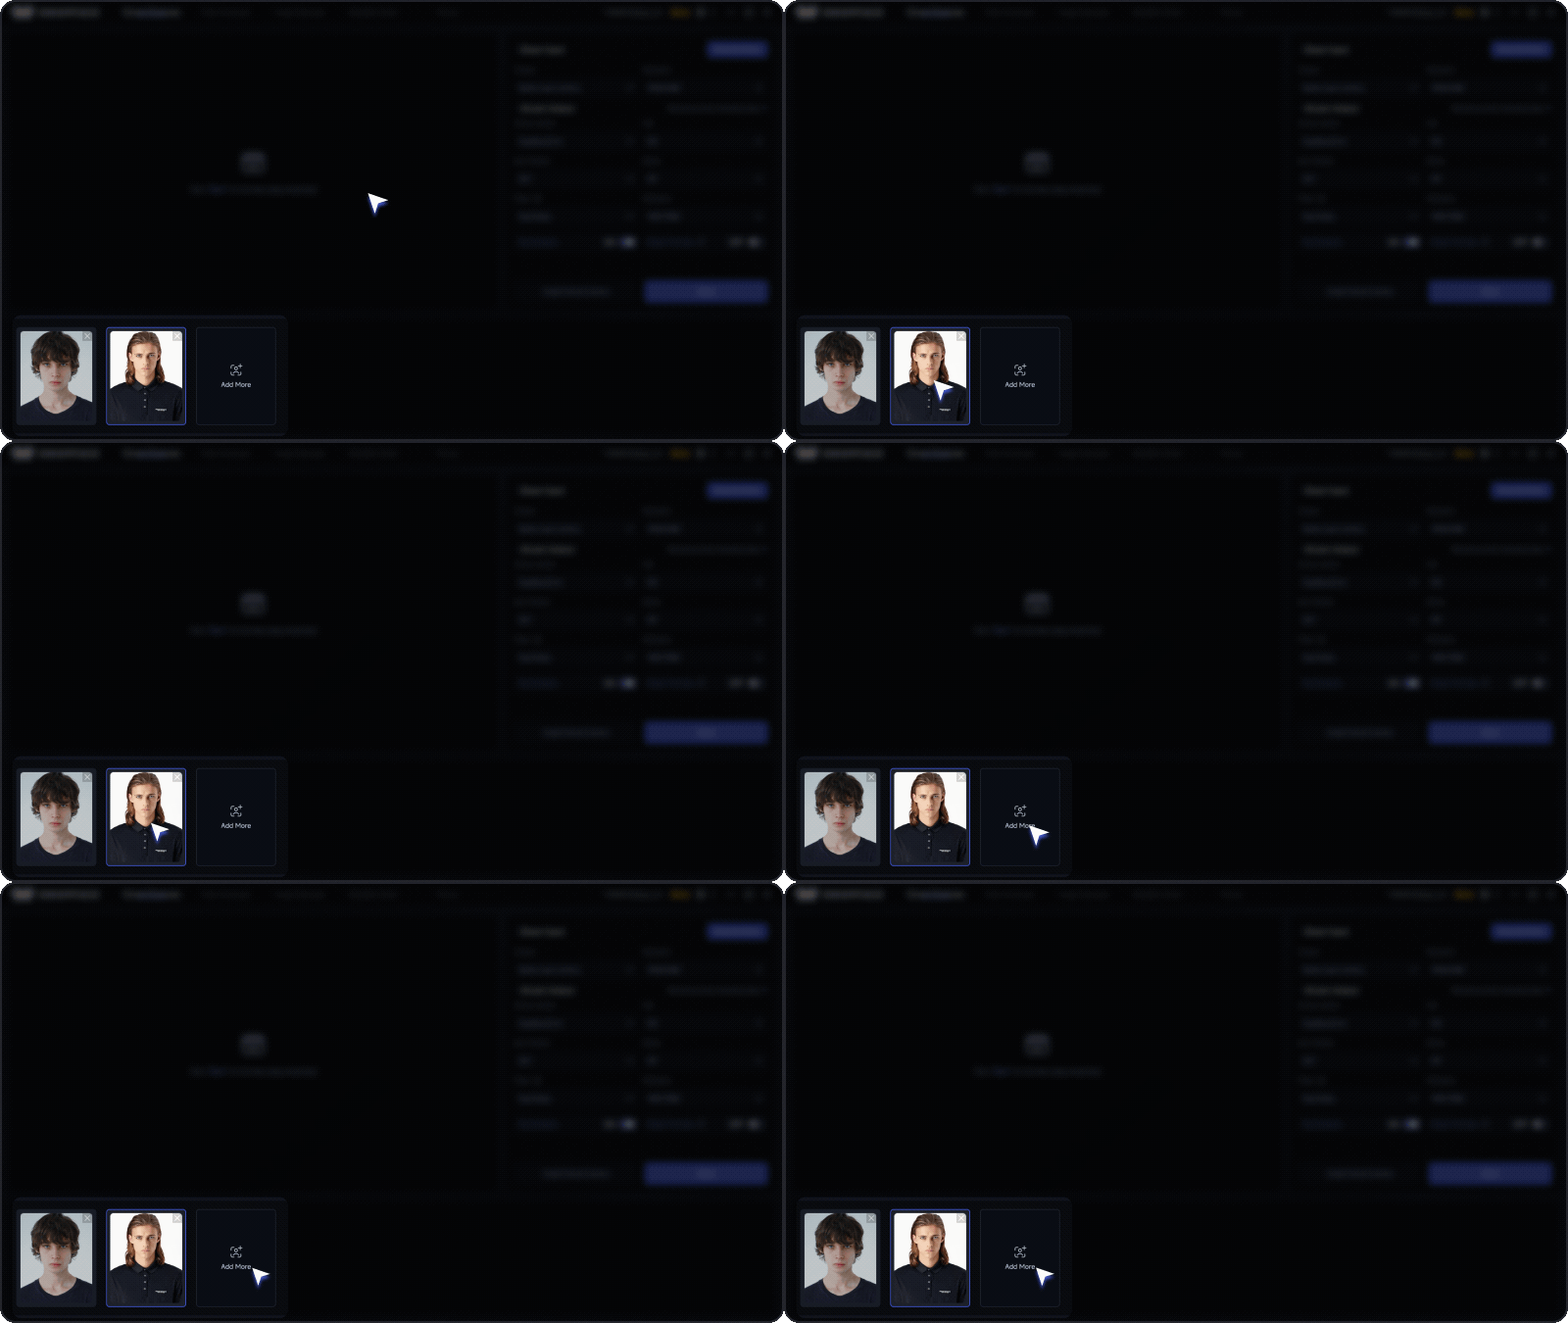
In the face area at the bottom of the interface, select a face you already added.
After you select it, Swapface applies that face to the current camera feed.
To use a new face, click:
Add More
Then upload a clear face image.
For more stable realtime face swap, use:
A front-facing, clear, unobstructed face photo with even lighting.
After uploading, select that face.
3.4 Select the output device
Next, in Stream Output, select:
OBS Virtual Camera
This step is critical.
Swapface applies realtime face swap to the camera feed first, then outputs the processed feed through OBS Virtual Camera to Google Meet, Zoom, or other video apps.
If OBS Virtual Camera is missing from the list, confirm the earlier OBS install and virtual camera steps are done, then restart Swapface.
3.5 Start realtime face swap
Confirm these three settings are correct:
Camera Input
The camera feed displays normally.
Face
The face you want to use is selected.
Stream Output
OBS Virtual Camera is selected.
Then click:
Start
Swapface begins processing the camera feed in realtime.
If the preview already shows the face-swapped result, Stream itself is configured.
04 Use Swapface in video call apps
After Stream is configured, Swapface can output the processed realtime feed through OBS Virtual Camera.
Next, switch the camera in your video call app to OBS Virtual Camera to see Swapface’s realtime face-swapped feed.
4.1 Open a video call app
Launch the video call or meeting app you plan to use, for example:
- Google Meet
- Zoom
- Microsoft Teams
Before joining a meeting or video call, open that app’s camera settings first.
4.2 Select OBS Virtual Camera
In Zoom, go to:
Settings → Video / Camera
In the camera device list, select:
OBS Virtual Camera
After selecting it, the video call app receives the Swapface-processed feed instead of the original camera.
4.3 Check the live feed
After switching, check the video preview.
If you can see the face-swapped result from Swapface, the full Stream workflow is set up correctly.
You can now join meetings, video calls, or livestreams as usual.
4.4 Keep Swapface running while you use it
During the video call, keep Swapface Stream running.
If you close Swapface, stop Stream, or change the output device, the feed in the video call app will also stop or fall back to another camera source.
To change faces, return to Swapface, select a different face on the Stream page, then continue.
4.5 If the video app shows no feed
If you already selected OBS Virtual Camera but the video app still shows no feed, check these in order:
→ Has Swapface already clicked Start
→ Is Stream Output set to OBS Virtual Camera
→ Is OBS Virtual Camera installed and enabled correctly
→ Has the video call app switched to OBS Virtual Camera
→ Restart the video call app
After these checks, most camera recognition issues can be ruled out.
That completes the full Swapface Stream workflow on Mac: camera input, realtime face swap, virtual camera output, and video call connection.
You may also need
SwapFace Windows User Manual
A complete SwapFace Windows realtime face swap manual—from installation and quick setup to effect optimization and troubleshooting.

How to Use Swapface for WhatsApp Video Calls on Windows
A complete setup guide for routing Swapface realtime face swap through ManyCam or WeCam so you can use it in WhatsApp video calls on Windows.
Swapface Android Emulator Tutorial
A complete guide to using Swapface realtime face swap for WhatsApp video calls on Windows via the Nox Android Emulator, OBS Virtual Camera, and WeCam.
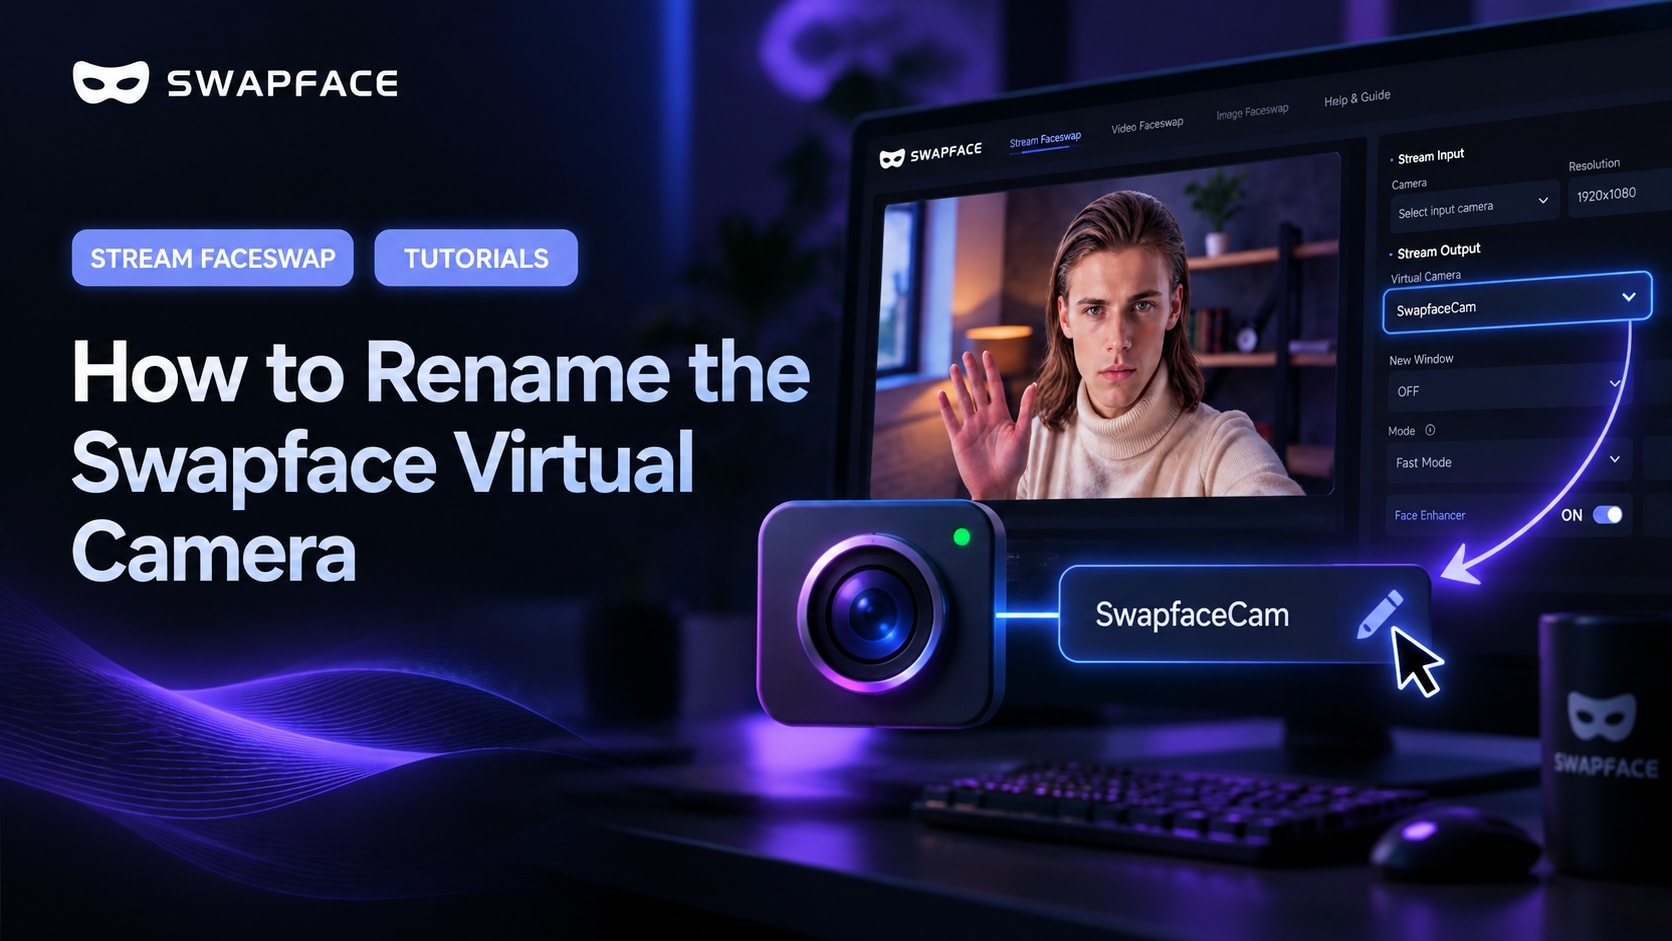
How to Rename the Swapface Virtual Camera
By default, apps see your camera as “SwapfaceCam”. Here is how to give the Swapface virtual camera any name you like, in about two minutes.
How to Install Swapface on Windows
System requirements, the right install location, and the mistakes that cause most installation problems — everything you need to set up Swapface on Windows.