



01 How it works
Before you start setup, take a moment to understand how the apps in this workflow connect to each other.
This tutorial uses Nox Android Emulator as the example to run Android WhatsApp on Windows and use Swapface for realtime face-swap video calls.
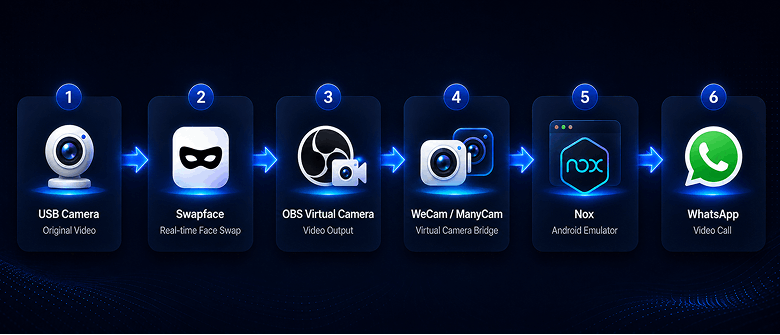
What does each app do?
USB Camera
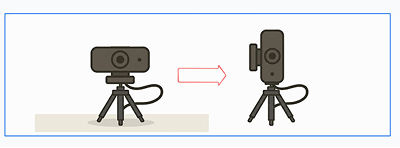
Captures your original video feed. In this tutorial, rotate the camera 90° to the right and place it upright so the feed matches portrait video later.
Swapface
Swapface reads the USB camera feed and performs realtime face swap.
In Swapface, set the video output to:
OBS Virtual Camera
WeCam or ManyCam will then read this video output.
WeCam / ManyCam
WeCam or ManyCam receives the feed from OBS Virtual Camera.
The original tutorial mainly uses WeCam, and also covers ManyCam as an alternative.
Nox Android Emulator
Nox runs an Android environment on Windows and hosts WhatsApp.
After the virtual camera is set up, use the tool provided in this tutorial to configure the WeCam camera inside Nox.
WhatsApp
Once everything is ready, open WhatsApp in Nox and start a video call.
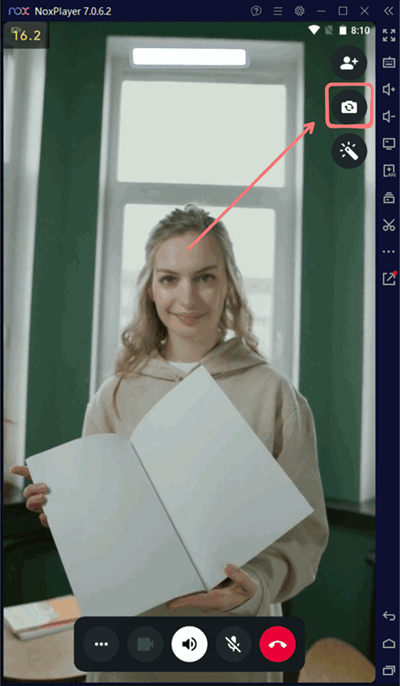
If the final feed is not shown in portrait, use the Switch button mentioned in the tutorial to toggle orientation.
02 Prepare required software
Before configuring the Android Emulator, install the software and components this tutorial uses.
Tools covered in this guide:
- OBS Studio
- WeCam
- ManyCam
- AN9Picker
- Nox Android Emulator
- vc_redist.x86.exe
These tools are used for video output, virtual camera relay, running the Android Emulator, and injecting the camera later.
You can also download all required files from Transfer.it.
 Download Transfer.it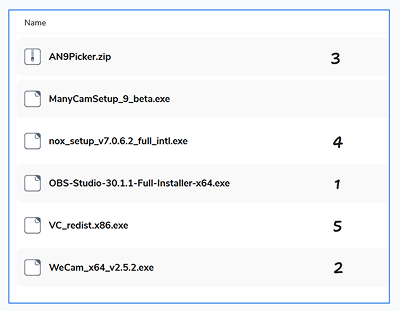
2.1 Install OBS Studio
First, install OBS Studio.
In later Swapface setup, you will use OBS Virtual Camera as the video output.
After installation, keep OBS Studio available—you will use it again when configuring Swapface.
2.2 Install WeCam
Install WeCam.
This tutorial mainly uses WeCam as the virtual camera relay to receive the OBS Virtual Camera feed.
Later in WeCam, select:
OBS Virtual Camera
as the video input.
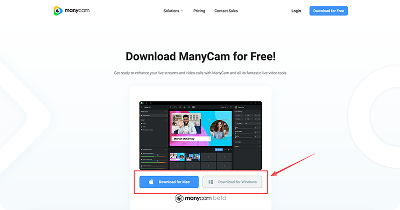
2.3 ManyCam
Install ManyCam.
If you use ManyCam, you can also follow the ManyCam setup in the “Use ManyCam to connect Swapface” tutorial.
2.4 Prepare AN9Picker
Download and extract AN9Picker. Later you will use AN9PickerUI.exe from that folder to configure the virtual camera in Nox Android Emulator.
(AN9Picker is a tool shared by marktohark for changing the default camera of an Android Emulator.)
For now, only download and extract it—you do not need to run it yet.
2.5 Install Nox Android Emulator
Install Nox Android Emulator.
Nox runs Android on Windows, and you will install and use WhatsApp in later steps.
After installation, you do not need detailed setup yet. Display and camera settings for Nox come later.
2.6 Install vc_redist.x86.exe
Install: vc_redist.x86.exe
When finished, make sure all of the software and components above are ready before continuing to camera and Swapface setup.
03 Set up camera and Swapface
After the software is ready, set up the USB camera and configure the matching video input and output in Swapface.
This section covers two tasks:
- Adjust camera orientation
- Set input, output, resolution, and rotation in Swapface
3.1 Adjust USB camera orientation
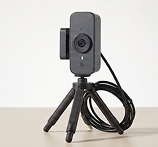
First, rotate the USB camera 90° to the right and place it upright.
This makes the later video feed better suited for portrait display.
After the camera is positioned, open Swapface for the next settings.
3.2 Select USB Camera as input
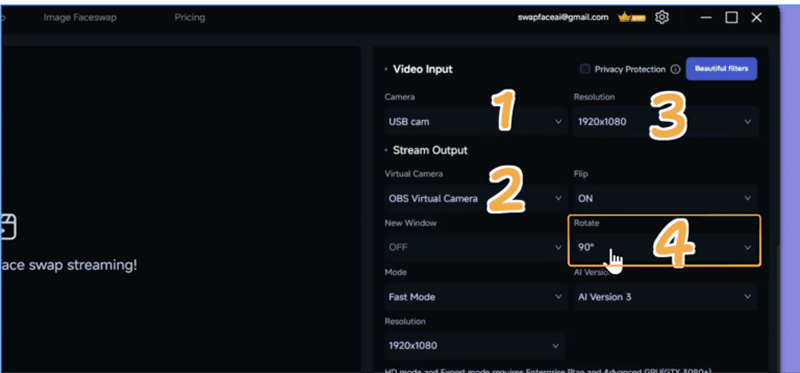
Open Swapface and go to the Stream settings area. In Stream Input, select your USB camera. Confirm the camera works and that you can see a live feed in the preview area.
3.3 Set OBS Virtual Camera as output
In Stream Output, set the virtual camera to: OBS Virtual Camera
WeCam or ManyCam will then read the video feed from OBS Virtual Camera.
Set the video resolution to 1920 × 1080. Then start Stream and confirm Swapface shows the camera feed correctly.
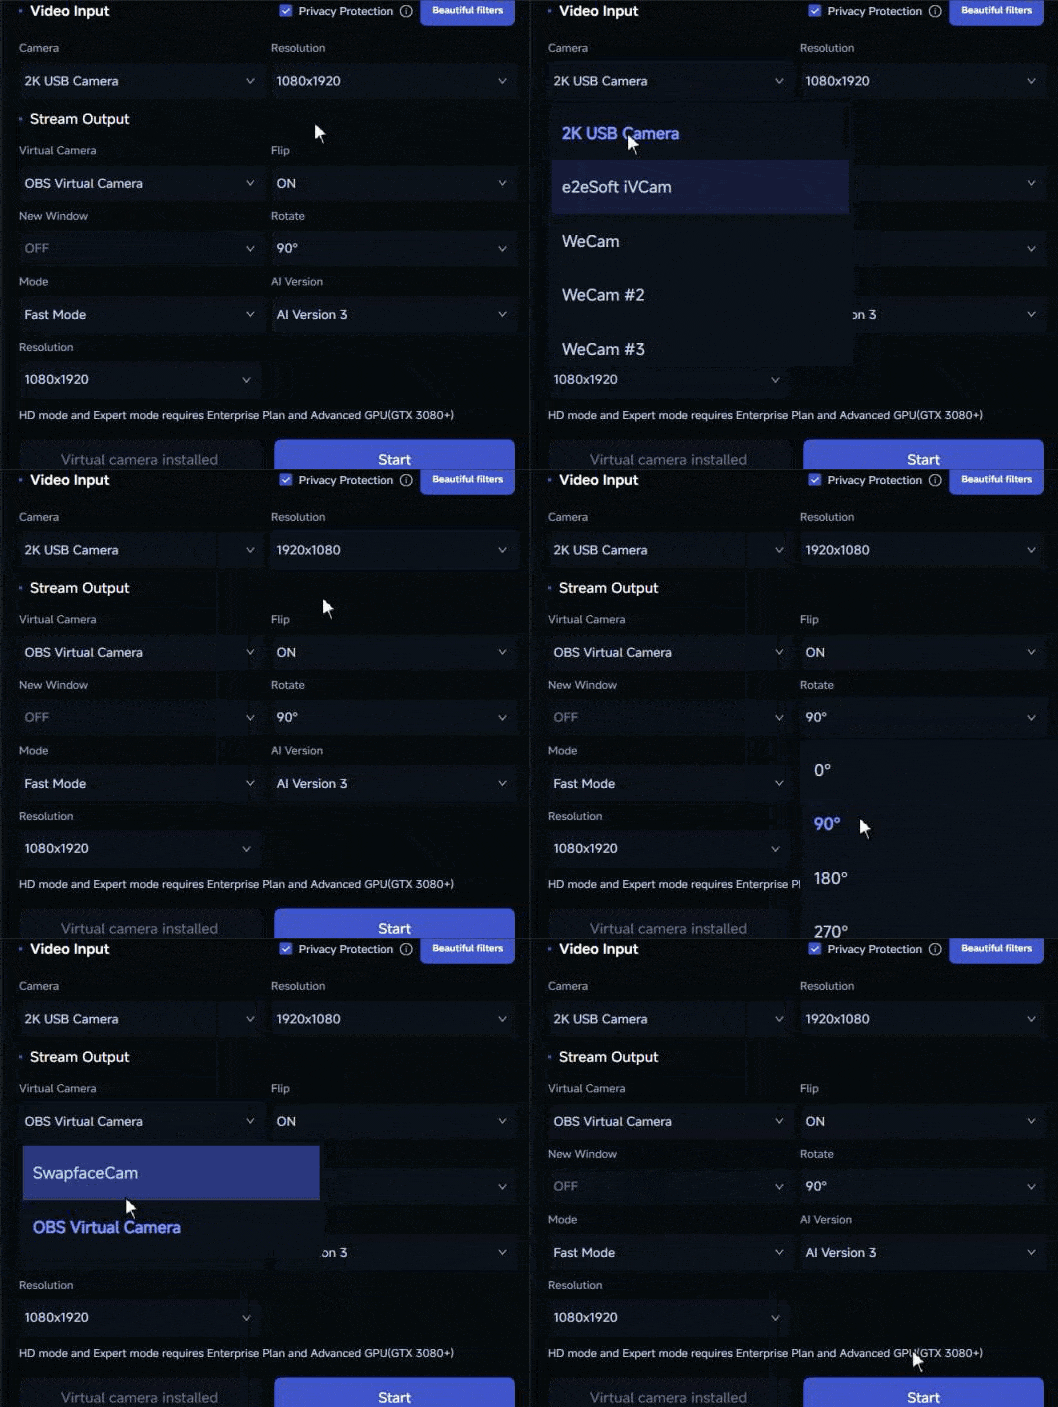
Note
If you do not see your face after swapping, first try steps 1–3 without rotation. Then complete step 4 (rotate back) as a full sequence, or restart your computer.
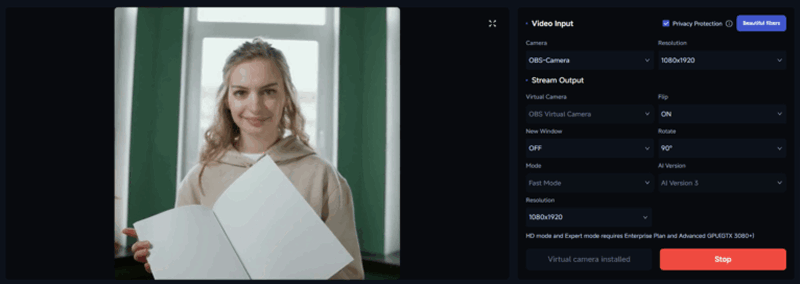
If you can see yourself in Swapface, continue to the next step.
04 Configure WeCam / ManyCam virtual camera
After Swapface is set up, import the OBS Virtual Camera feed into WeCam or ManyCam.
This step lets WeCam / ManyCam receive Swapface’s output and become the virtual camera source that Nox Android Emulator will use next.
4.1 Use WeCam
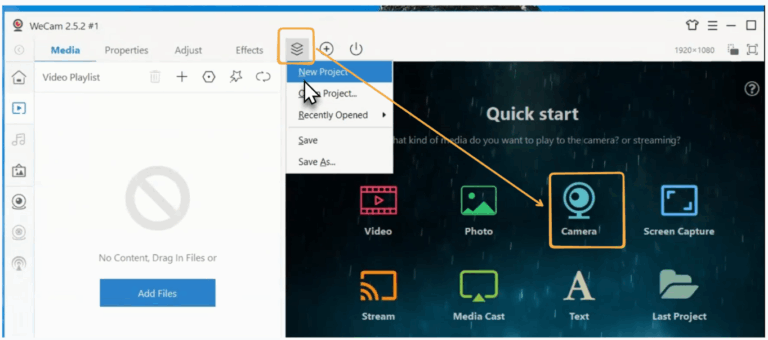
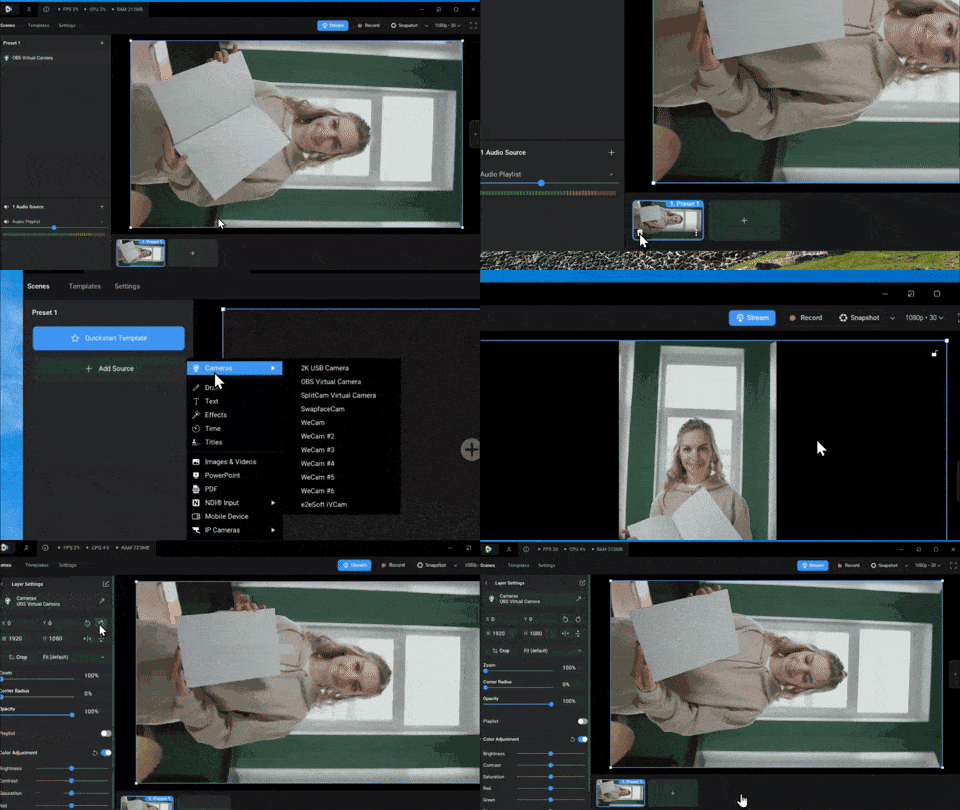
This tutorial mainly uses WeCam as the example. After opening WeCam, create a new camera project.
Step 1 — Create Camera Project
Create Camera Project
After opening WeCam, create a new camera project:
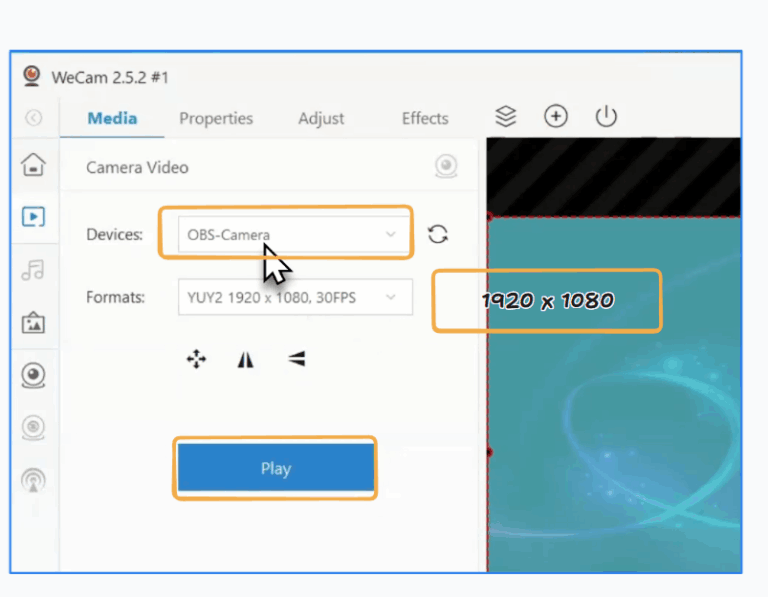
Step 2 — Select OBS Virtual Camera
Inside the Camera Project, set the camera source to:
OBS Virtual Camera
Then check the current video resolution.
If the resolution is not:
1920 × 1080
Restart WeCam and check again.
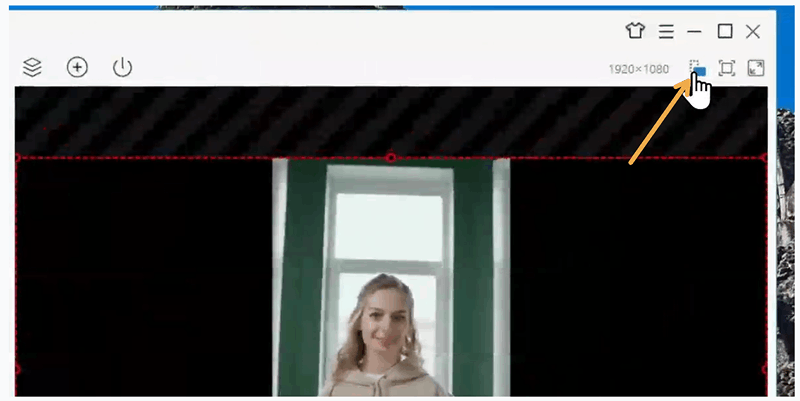
Step 3 — Adjust orientation
After selecting OBS Virtual Camera, use Rotate in WeCam to adjust the feed orientation.
Because the USB Camera and Swapface were already rotated for portrait, continue adjusting orientation in WeCam so the final feed stays correct.
Step 4 — Enable WeCam virtual camera
After the video source and orientation are set, go to WeCam’s:
Output → Virtual Camera
Then click:
Enable
to apply the current settings.
Next, enable Virtual Camera so WeCam can output the feed to other apps as a virtual camera.
Once enabled, Nox or other apps can detect and use WeCam as the camera source.
4.2 Watch the full WeCam walkthrough
4.3 Use ManyCam
If you installed ManyCam instead of WeCam, follow the ManyCam tutorial provided in the article.
05 Configure Nox Android Emulator
After the virtual camera is ready, configure Nox Android Emulator so WhatsApp can run in a portrait Android environment.
5.1 Start Nox
Open Nox Android Emulator. After it launches, confirm Nox starts normally and reaches the Android home screen. Install and open WhatsApp in Nox.
After signing in, make sure WhatsApp opens to the main screen normally.
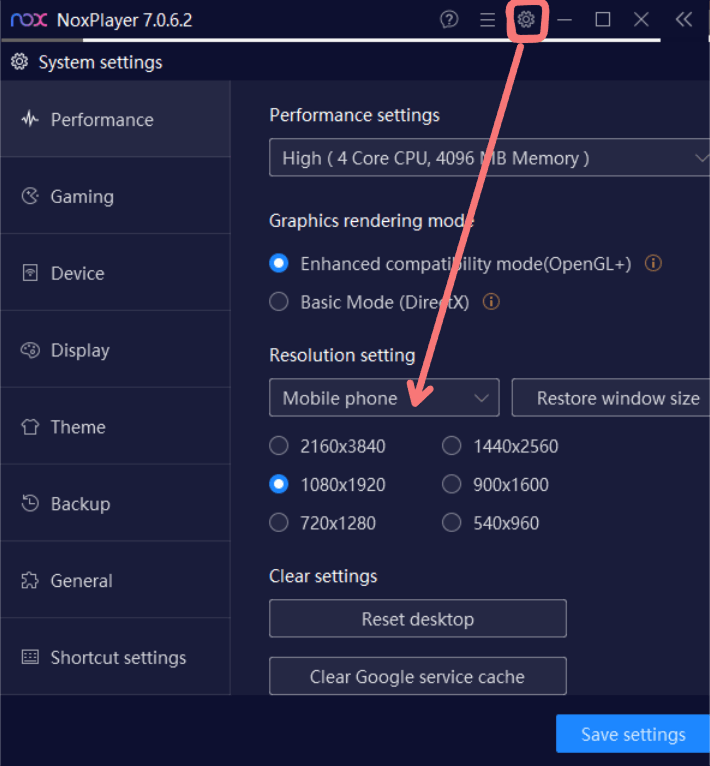
5.2 Set portrait resolution
Open Nox display settings, set the device type to phone, and use a portrait resolution.
You can use 1080 × 1920 or 900 × 1600. After applying the settings, save the configuration. Then restart Nox; sometimes this must be done before running Nox.
5.3 Restart Nox
After changing the resolution, restart Nox so the new display settings take effect. When you re-enter the emulator, confirm the system is shown in portrait.
5.4 Check Hyper-V
If Nox cannot start or run normally, check Hyper-V settings in Windows. Depending on your system environment, disable Hyper-V. then restart Nox.
After Nox portrait and runtime setup is done, the next step is injecting the WeCam virtual camera into Nox.
06 Inject the virtual camera into Nox
After basic Nox setup, inject the WeCam virtual camera into Nox so the Android Emulator can detect and use the video feed you configured earlier.
6.1 Close Nox
Before injection, fully quit Nox Android Emulator. Make sure Nox is not running, then continue.
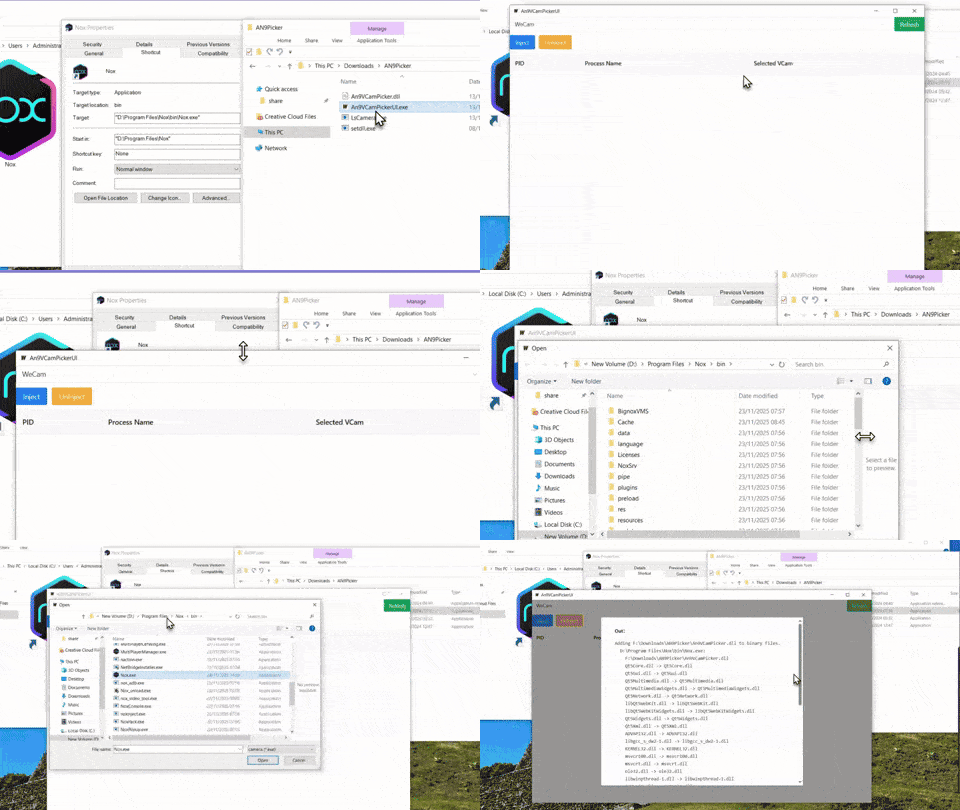
6.2 Open AN9Picker
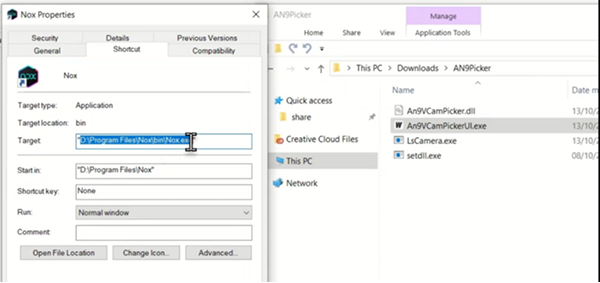
Find the AN9Picker folder you already downloaded and extracted. Run AN9PickerUI.exe to open the camera injection tool.
6.3 Select WeCam
In AN9Picker, select the virtual camera you want to inject.
Select WeCam. Make sure this is the WeCam virtual camera you already configured and that is outputting a live feed.
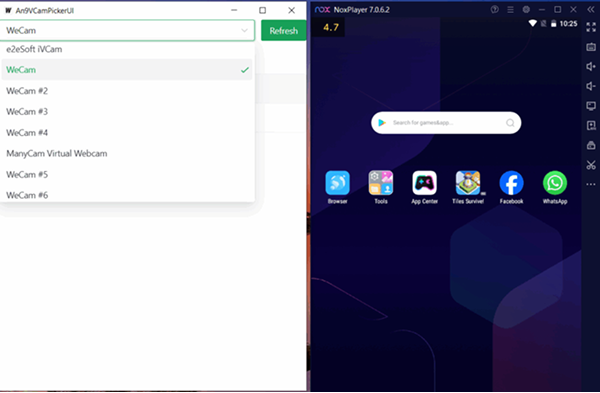
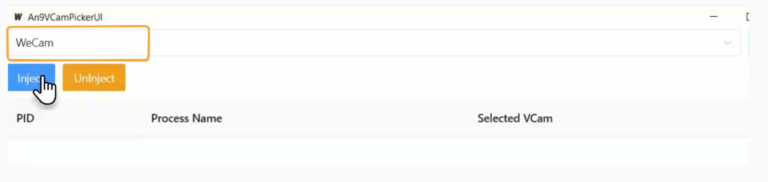
6.4 Click Inject
After confirming the camera selection, click Inject. Then choose Nox.exe from the Nox install directory (for example C:\Program Files\Nox\bin\Nox.exe).
After you select it, the tool injects the WeCam virtual camera into Nox.
You can review the exact steps in the full walkthrough.
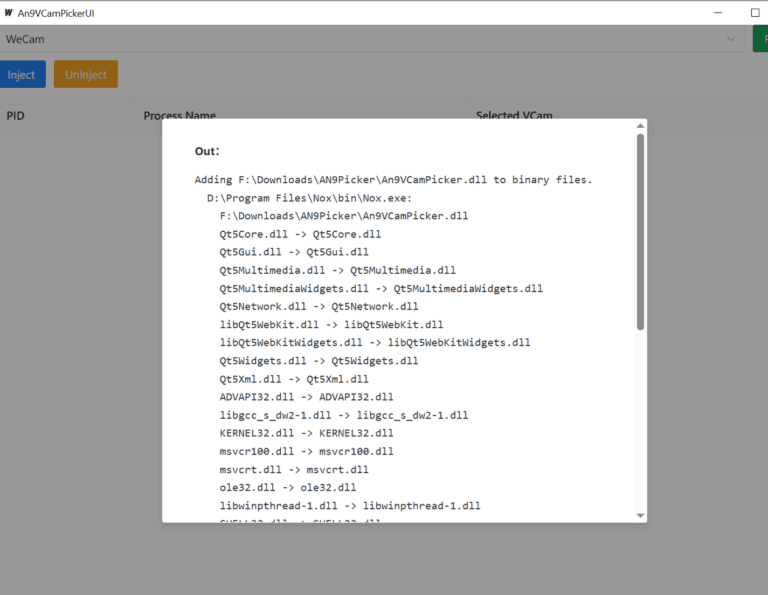
6.5 Finish injection
After injection completes, restart Nox.
Nox can now use the virtual camera feed output by WeCam.
At this point the full video chain is connected to the Android Emulator:
USB Camera → Swapface → OBS Virtual Camera → WeCam → Nox
Next, open WhatsApp and start a video call.
07 Start WhatsApp video call
You may also need
SwapFace Windows User Manual
A complete SwapFace Windows realtime face swap manual—from installation and quick setup to effect optimization and troubleshooting.
How to Use Swapface for WhatsApp Video Calls on Windows
A complete setup guide for routing Swapface realtime face swap through ManyCam or WeCam so you can use it in WhatsApp video calls on Windows.
Swapface Stream Mac Complete Guide
A complete Mac guide covering the workflow, installing Swapface and OBS, configuring Stream, and using OBS Virtual Camera in Zoom, Meet, and other apps.
How to Rename the Swapface Virtual Camera
By default, apps see your camera as “SwapfaceCam”. Here is how to give the Swapface virtual camera any name you like, in about two minutes.
How to Install Swapface on Windows
System requirements, the right install location, and the mistakes that cause most installation problems — everything you need to set up Swapface on Windows.