



By default, video apps list the Swapface virtual camera as SwapfaceCam. If you would rather have it show up under a different name — for example a generic “HD Camera” — you can rename it with our custom-name tool. The whole process takes about two minutes.
Before you start
Close Swapface, your browser, and any other software that may be holding on to a camera (video call apps, ManyCam, WeCam and similar tools). If a program is using the virtual camera while you rename it, the change will not apply.
Rename the camera in three steps
- Install the tool (only needed once). Download and run swapfacecam_install.exe.
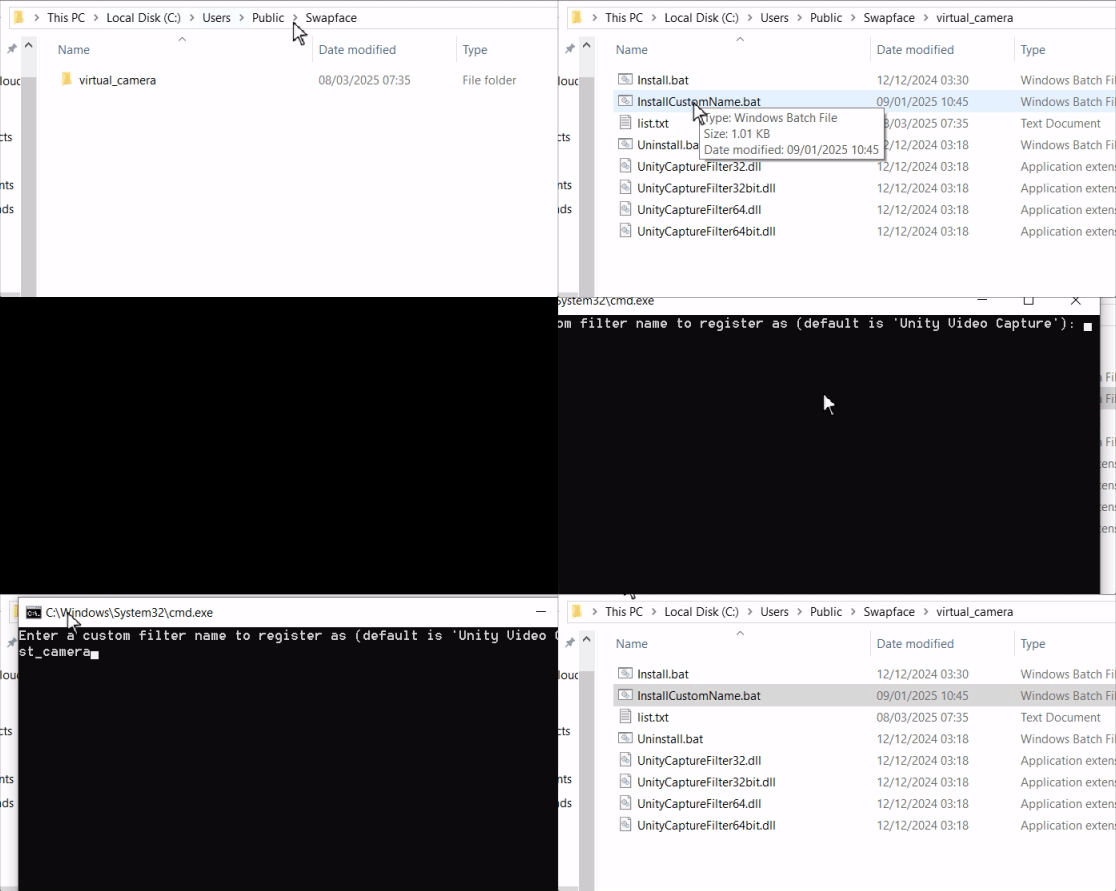
- Set your camera name. Open
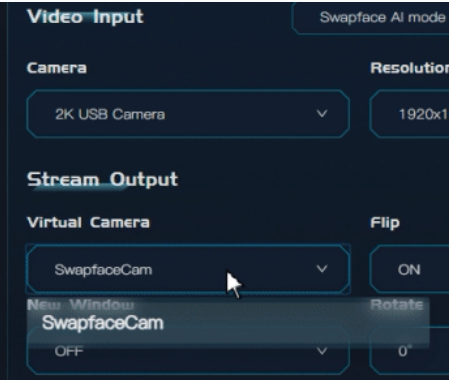
C:\Users\Public\Swapface\virtual_camera, double-click InstallCustomName.bat and type the name you want. - Select the camera in Swapface. Restart Swapface and choose your renamed camera from the virtual camera dropdown.
If the new name does not appear
Restart the app you are checking with (Zoom, Chrome, and most call apps only refresh their camera list on launch). If it still shows the old name, restart Windows once — the virtual camera driver reloads with the new name.
Ready to go live? See our full guide: SwapFace Windows User Manual.