



Setting up Swapface on Windows takes only a few minutes, but a couple of details — where you install it and what GPU you have — decide whether everything runs smoothly. Here is the complete checklist.
System requirements
- OS: Windows 10 (Anniversary Update) or newer.
- GPU: Swapface runs machine-learning models, so a dedicated GPU matters. Minimum: NVIDIA GeForce RTX 2070 or Radeon RX 5700. For real-time streaming we recommend an RTX 4070 Ti or higher; for offline video and image swaps, the more powerful the better.
- RAM: 16 GB or more.
We recommend NVIDIA GPUs — paid users can additionally activate NVIDIA acceleration (about a 2× speed boost) in the app.
Installation
- Download the Windows installer from the official download page.
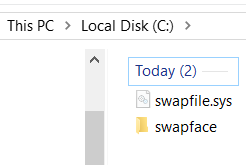
- Install to the root of a drive, for example
C:\swapfaceorD:\swapface. - Run Swapface.exe and sign in.
Four mistakes to avoid
- Don't install into
C:\Program Files— Windows may block the app from saving its settings. If you already did, reinstall toC:\swapface. - Don't install over an old version. Move or delete the previous installation first.
- Don't copy the installed folder between PCs, and don't run Swapface from a removable drive.
- Use simple file names. If your system language uses non-Latin characters, name your image and video files with plain alphabetic names such as
abc.png.
If something goes wrong
- Try running Swapface as administrator.
- If the app worked before and suddenly doesn't, restart your PC or reinstall.
- If a file goes missing after installation, your antivirus may have quarantined it — restore the file from the antivirus quarantine and restart the app. Swapface is safe; the false positive comes from the app bundling GPU acceleration binaries.